


Introduction
In this article, I will be writing about how to deploy a sample nodejs application to AWS EC2 Server from Gitlab CI.
Pre-requisites
It is advantageous if you have the following knowledge, to better understand the practical example I'm about to show but it is not mandatory.
Basic knowledge of git commands and remote git repo ( e.g. gitlab ) in this example.
Basic knowledge of Dockerfile structure and the role of Dockerfile in building your application as a container image.
Understanding how the
docker buildcommand works.What is CI/CD and how we can use that to automate our deployment process?
Abstract
In this section, I will explain a little bit about the project and workflow I'm trying to implement. Suppose we have a nodejs application hosted in our Gitlab project repository, we will first create a Dockerfile to containerize that application. Then we will add a CI/CD workflow to our project's repository. For that, we will need a .gitlab-ci.yml file for our CI/CD configuration. In this config file, we will define our first job to build a container image and store that image in our own Gitlab container registry. Then the next job will be about deploying our application as a docker container inside an EC2 instance.
Demo
Building Docker image
First of all, our project directory will look like this:
.
├── .gitlab-ci.yml
├── README.md
└── src
    ├── .gitignore
    ├── Dockerfile
    ├── index.js
    └── package.json
Since this is a knowledge-sharing blog about deploying an application, I will primarily focus on the Dockerfile and CI/CD parts.
Let's have a look at our Dockerfile and what it does.
FROM node:14

COPY . /app
WORKDIR /app

RUN npm install

ENV NODE_ENV Testing

EXPOSE 2019

CMD ["npm", "start"]
Firstly, this Dockerfile uses node:14 as its base image.
Then it copies all the files inside the current directory to the directory called /app inside the container. Then, we define our startup directory in the container as /app.
In the third stage, we install our dependencies declared in the package.json file into our development environment.
The fourth stage is about creating an environment variable inside our container.
In the fifth stage, we open port 2019 inside the container so our application can listen to that particular port.
In the final stage, we set the command to run when our container starts and the command is
npm startscript we defined in the package.json file. This command will start listening our HTTP web server in port 2019.
Now, we know about the steps which will be used in building our docker image. We can test build our docker image with docker build command manually to test that our Dockerfile works correctly:
cd <project-dir>/src
docker build -t node_test:v1 .
The above command will build a docker image named node_test with tag v1. After the command ends, you can check images within your system with docker images command and you will see our test image.
CI/CD Configuration
Now, let's talk about CI/CD configuration in GitLab. GitLab uses a configuration file called .gitlab-ci.yml file to define our pipeline jobs. So, you must create that file in the root directory of our repository. Additionally, you can create environment variables in Settings -> CI/CD section to be re-used in CI/CD pipeline.
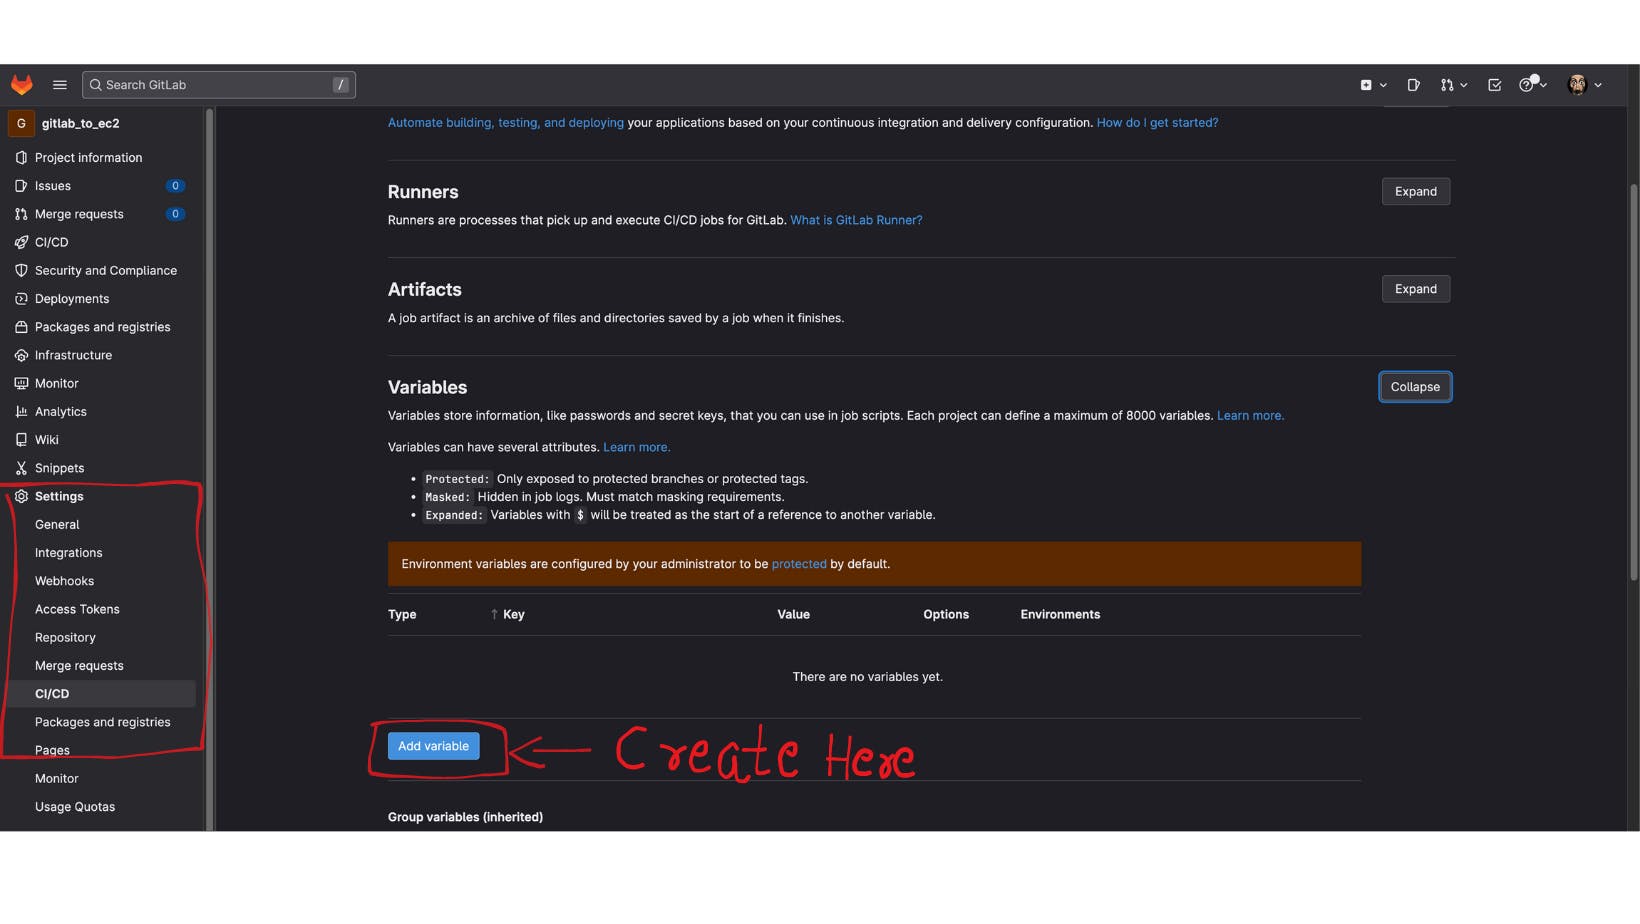
For our example, I created the following variables with appropriate values to be re-used in our pipeline.
CI_REGISTRY - GitLab Registry URL to be used when pulling docker image. ( registry.gitlab.com )
CI_REGISTRY_USER - Your GitLab Username
CI_REGISTRY_PASSWORD - Your GitLab Password
EC2_IP - Public IP of your EC2 instance
SSH_PRIVATE_KEY - Content of the Private key file which you created when provisioning ec2 instance
#run
image: docker:stable
services:
  - docker:18.09-dind

variables:
  CONTAINER_IMAGE: $CI_REGISTRY_IMAGE:$CI_COMMIT_SHA
  APPLICATION_FOLDER: ./src/

stages:
  - build
  - deploy

build-image:
  stage: build
  script:
    - docker login -u gitlab-ci-token -p $CI_JOB_TOKEN $CI_REGISTRY
    - docker build --no-cache -t $CONTAINER_IMAGE $APPLICATION_FOLDER
    - docker push $CONTAINER_IMAGE
  only:
    - main
Let's look at our .gitlab-ci.yml configuration file now. This file will be divided and explained into two pieces because it contains two jobs at separate job stages called build and deploy.
The first section of this file is for configuring a default base image that will be used if no specific image is given in your jobs.
The second component, variables, is where you define your global variables, which can be re-used across all jobs and stages.
Then we specify that our pipeline has two job stages called build and deploy.
Then, in the build stage, our actual task, build-image, is executed. This job executes three commands.
First, it logs into the GitLab docker registry using GitLab's built-in variables called gitlab-ci-token and CI_JOB_TOKEN.
And it executes the docker build command, as we saw before. Finally, upload the completed Docker image to the GitLab container registry.
deploy:
  stage: deploy
  image: ubuntu:latest
  before_script:
   - 'which ssh-agent || ( apt-get update -y && apt-get install openssh-client -y )'
   - eval $(ssh-agent -s)
   - mkdir -p ~/.ssh
   - echo "$SSH_PRIVATE_KEY" | tr -d '\r' > ~/.ssh/test.pem
   - chmod 600 ~/.ssh/test.pem

  script:
    - ssh -T -o StrictHostKeyChecking=no -i ~/.ssh/test.pem ubuntu@${EC2_IP} "curl -fsSL https://get.docker.com -o get-docker.sh && sudo sh ./get-docker.sh"
    - ssh -T -o StrictHostKeyChecking=no -i ~/.ssh/test.pem ubuntu@${EC2_IP} "sudo docker login -u "$CI_REGISTRY_USER" -p "$CI_REGISTRY_PASSWORD" "$CI_REGISTRY""
    - ssh -T -o StrictHostKeyChecking=no -i ~/.ssh/test.pem ubuntu@${EC2_IP} "sudo docker pull $CONTAINER_IMAGE"
    - ssh -T -o StrictHostKeyChecking=no -i ~/.ssh/test.pem ubuntu@${EC2_IP} "sudo docker run -itd -p 2019:2019 $CONTAINER_IMAGE"
  dependencies:
    - build-image
  only:
    - main
In the deploy stage, there is only one job called deploy. And the image we will be using to run this job is ubuntu.
before_script section allows you to specify a set of commands that should be run before your job execution to do necessary setups.
In this example, we install openssh-client if it isn't already installed in our image, and then copy the contents of the SSH_PRIVATE_KEY variable into a file called
test.pemin the .ssh directory.We used ssh to run four commands in our actual job script. First, by using a script, we first download and install Docker on our EC2 instance.
Second, log in to the GitLab registry by using
docker logincommand.Third, pull the docker image we created in the build stage by using
docker pullcommand.Finally, we run a container with the
docker runcommand and configure port mapping to provide access to our application from the outside world.
Summary
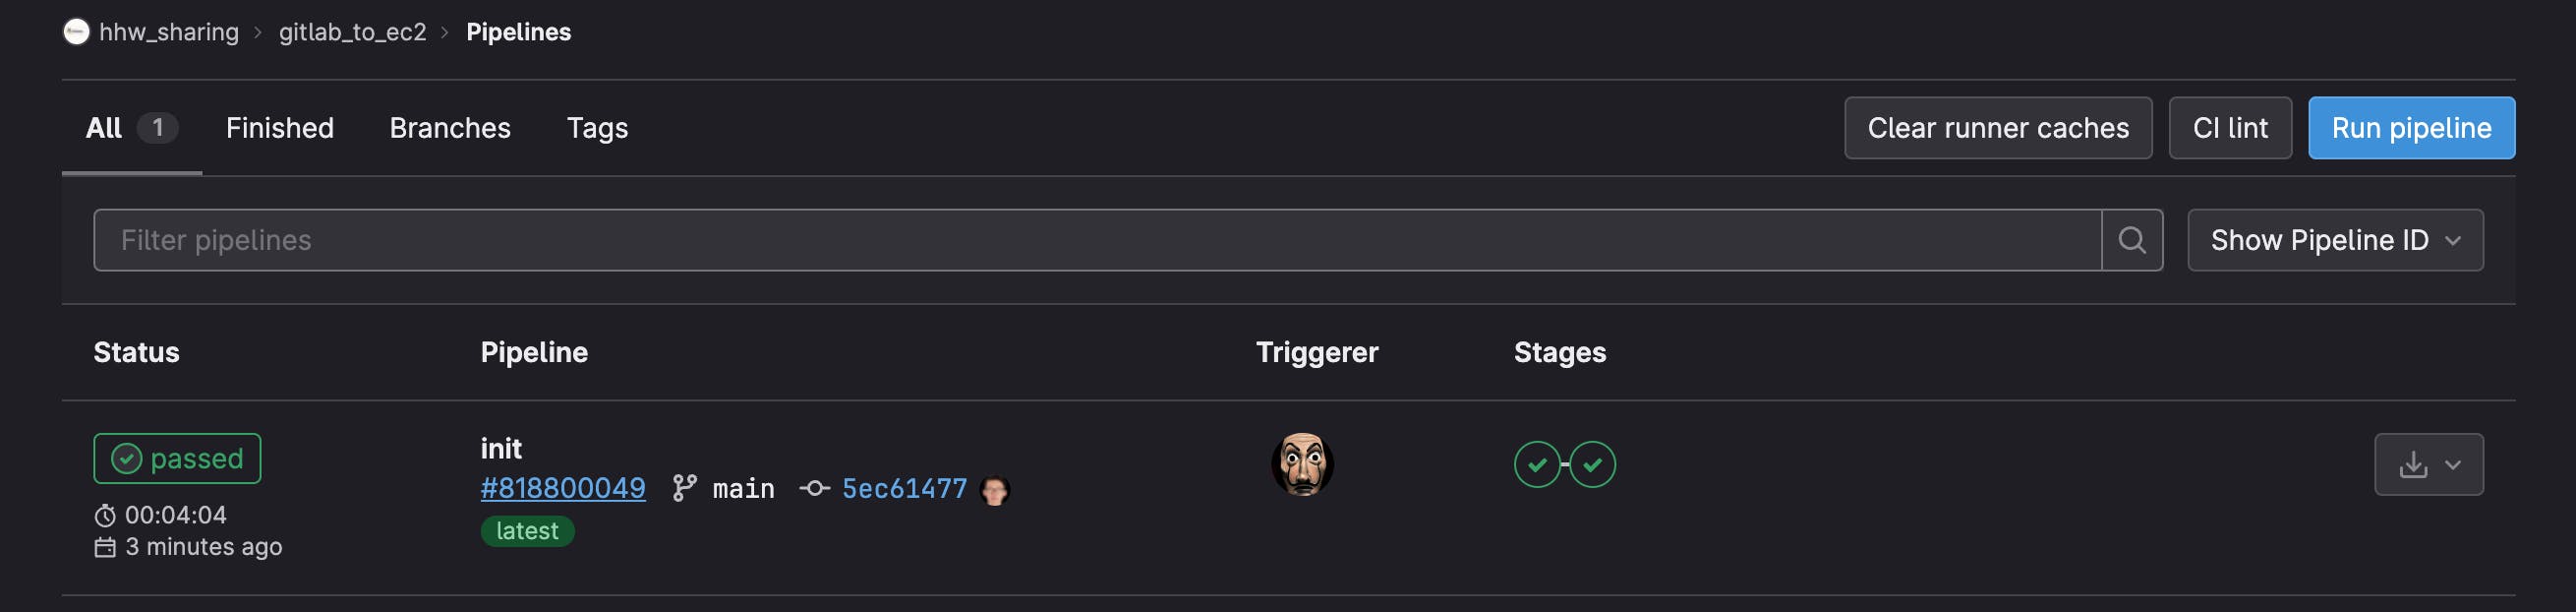
Now, if you see anything similar to the screenshot below in your GitLab repository, CI/CD -> Pipelines
You are aware that your pipeline has successfully ran and completed. As a result, you may verify that your application is running from your <EC2-IP>:2019 port.
Remember to grant port access from your ec2 instance's security group.
In this blog post, I demonstrated how to build up a GitLab CI/CD pipeline to deploy our sample nodejs application as a docker container inside an EC2 instance using a GitLab CI/CD pipeline. You are welcome to follow along and test if you wish. I'll give a link to my public GitLab repository under this area for your convenience.
Thank you very much.