


Deploy with AWS CodePipeline or AWS CodeDeploy?
What are the benefits, drawbacks and differences?


Introduction
Today, I'll talk about when to use AWS CodeDeploy and AWS CodePipeline in this blog article. Both are native AWS services that allow you to upload application code to a live server so that users may access and utilize your web application. But do you ever find yourself wondering what exactly CodeDeploy and AWS CodePipeline are? What are their unique use cases and so on?
Because if you are, I am here to explain your confusion today and perform a sample application deployment using both services.
Why do we use pipelines?
So, firstly, why do we need to use CI/CD pipelines? Was not it simpler to just copy and paste application source codes into servers?
The answer is No. Traditional deployment methods require developers to manually build their source code, and so-called system administrators must configure every aspect of the servers for the developed software package to function properly on that server. As a result, traditional deployment methods are not more straightforward than CI/CD pipelines because there may be so many human errors along the process.
As a result, we now use DevOps approaches in place of manual deployments because they are automated and free from human mistakes. The specified pipeline will conduct the required steps once developers push source code into a source code management system like Git, and it will then deploy the usable application to the live server.
Deploying a sample app with CodeDeploy and CodeCommit
In this part, I'll demonstrate how to use the CodeDeploy service to deploy a sample application that only contains the index.html file into an EC2 instance.
Step 1: Create a S3 bucket to store your code zip file
Firstly, create an S3 bucket in your account with a unique name such as demo-codedeploy-bucket-12214. Then, download the sample application code zip file from here.
Upload that zip file into the newly created S3 bucket by going into the AWS console or from AWS CLI.
Step 2: Create an EC-2 Server to host the application code
To begin with, set up an EC2 instance role that contains the two following permissions managed by AWS:
AmazonEC2RoleforAWSCodeDeployAmazonSSMManagedInstanceCore
Create an EC2 Instance with the following configurations:
Enter your preferred name in the Name box. (You will need this name later to select matching instances from CodeDeploy)
Choose Amazon Linux AMI with the AWS Logo.
Instance type to t2.micro.
Select
Proceed without a keypairIn the Security Group section, Choose
Create Security Groupand tick the boxes that say allow HTTP and HTTPS traffic from the internet.Under Advanced details, in the IAM instance profile section, choose the IAM role you created above.
That's all. Choose 1 for the number of instances and click
Launch instance.
Step 3: Create a CodeDeploy Application and Deployment Group
Now, head to the AWS CodeDeploy console and create the necessary configurations such as:
Firstly, create an IAM role with a name like
CodeDeployRolethat contains the following permissions:AWSCodeDeployRole
An Application with a name of your choice. Choose
EC2/On-premisesin Compute Platform choice.A Deployment Group with a suitable name that includes the following:
Service role - Choose the role you created in the above step.
Deployment type - Choose
In-placeEnvironment configuration - Choose
Amazon EC2 instancesand provide the Name and Value you put in the EC2 configuration.Deployment settings - Choose
CodeDeployDefault.OneAtATimeLoadbalancer - Untick the box of
Enable load balancing
Lastly, create a deployment for your created Deployment Group and choose
My application is stored in Amazon S3 and provides the s3 URI of your zip file.
You can go to the S3 bucket -> Click your object and copy the S3 URI in the top right corner.
- After you have created a deployment, the CodeDeploy will automatically run the first time with your configured specifications.
Step 4: Test your Deployment
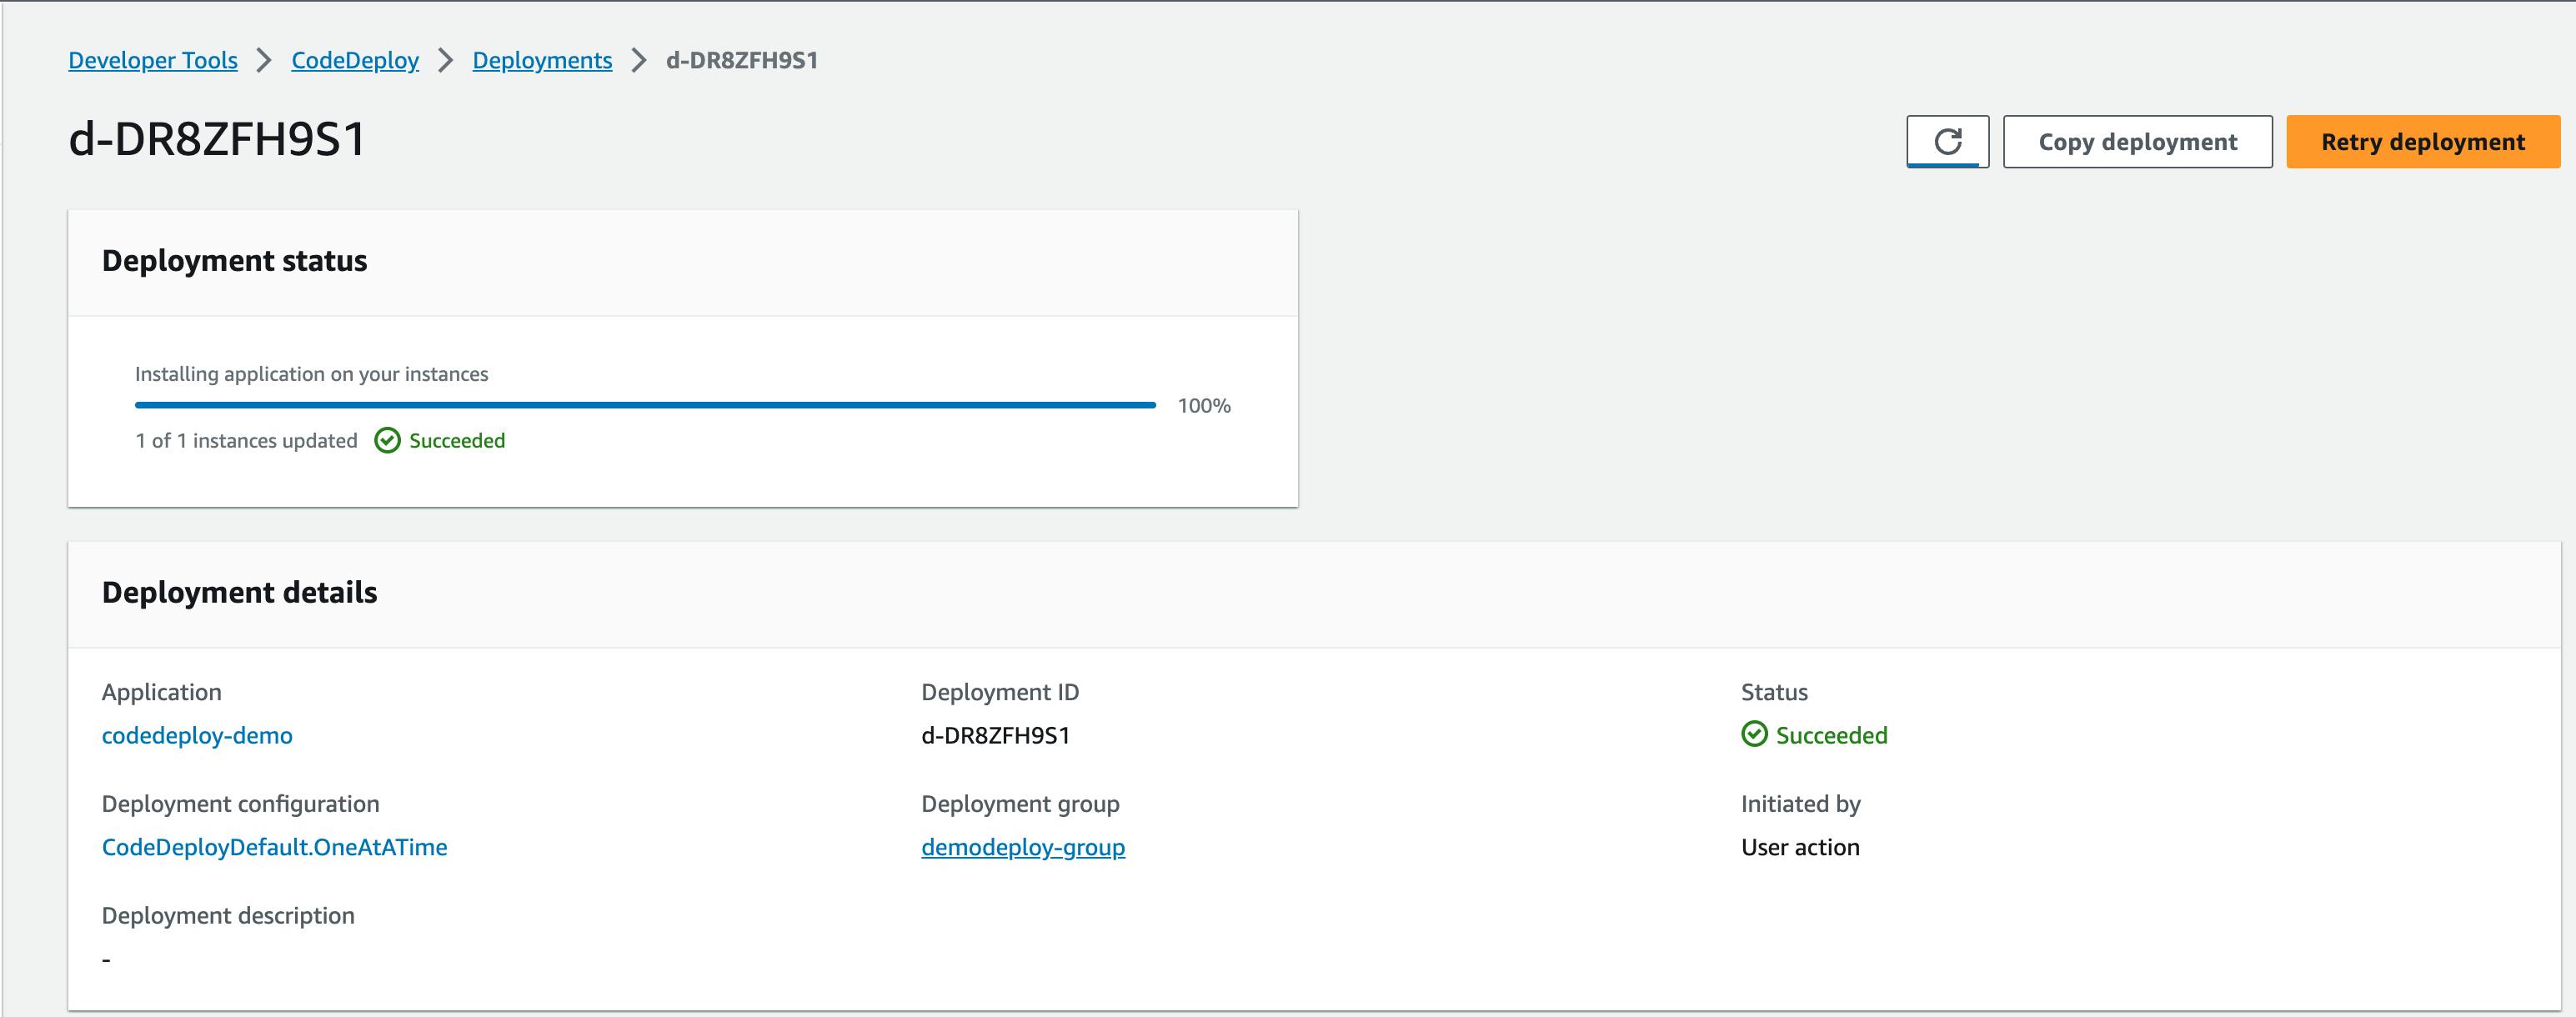
When your first Deployment is completed, you should see something similar like this:
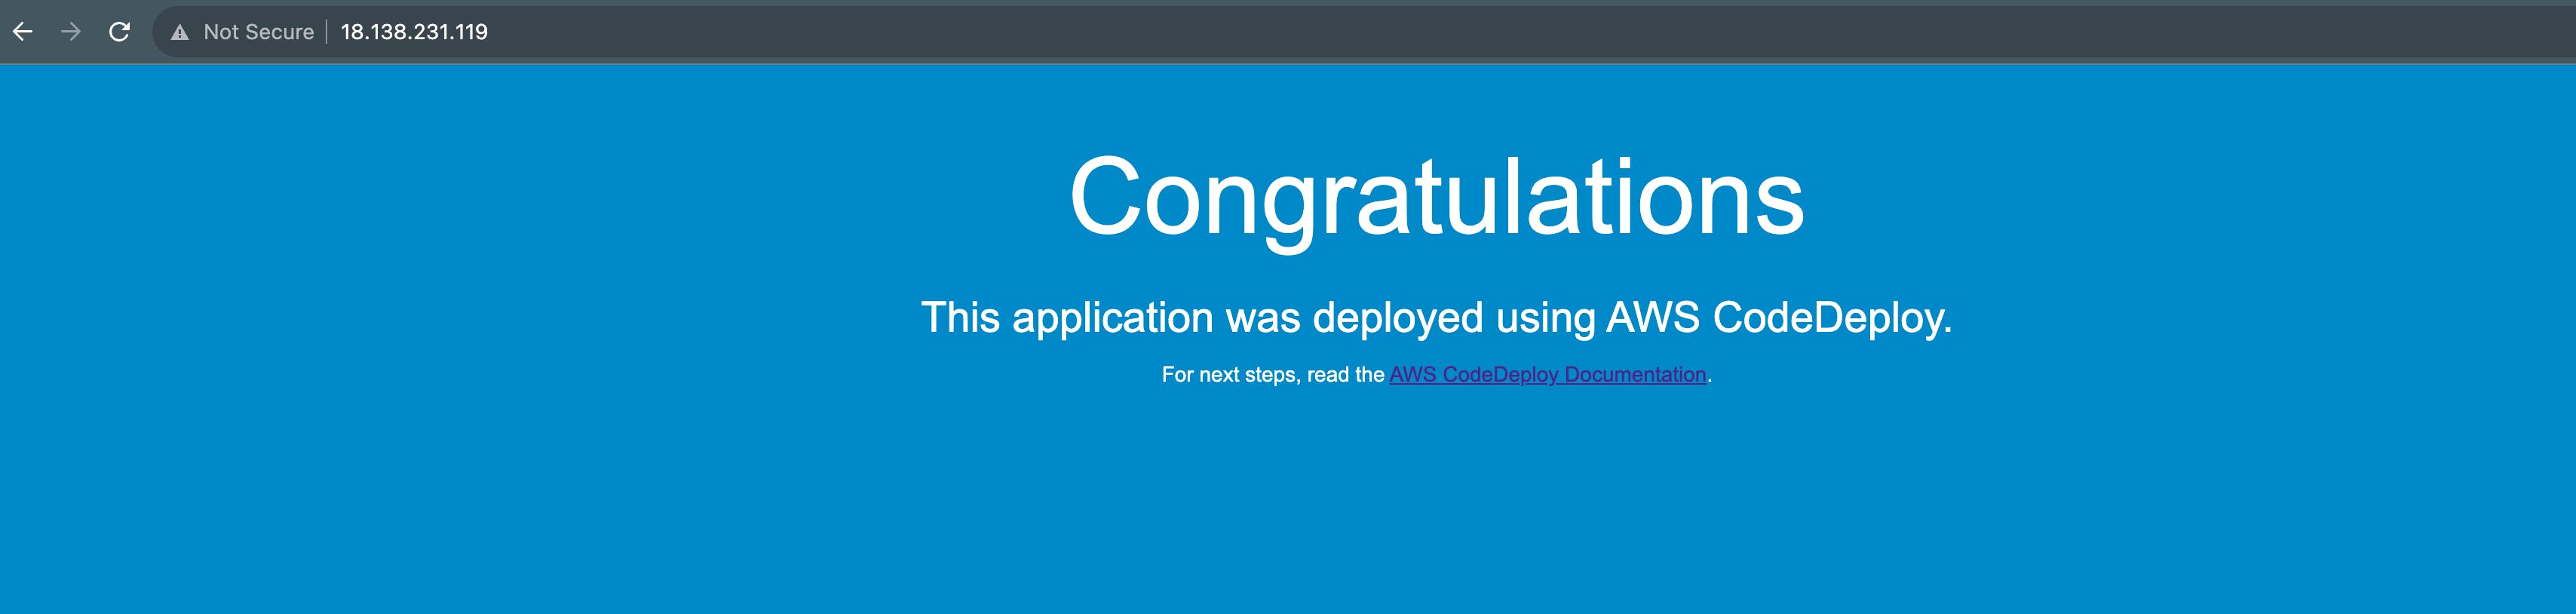
Now go into the AWS EC2 console and get your EC2 instance's public IP or DNS address. Call http://<your-ip-address> in the browser and if you see that page, you know that you have deployed a static index.html page successfully.
Deploying with AWS CodePipeline (3-stage pipeline)
In this part, I'll demonstrate how to use the AWS CodePipeline service to deploy a sample application into an EC2 instance with a 3-stages pipeline. The pipeline must run every time a developer commits code into a specified branch. The pipeline is configured to build the source code first and then deploy the built artifacts into a live server.
Step 1: Creating a CodeCommit Repository
Create an AWS CodeCommit Repository to store your code.
Search CodeCommit in the AWS console search bar.
Click
Create Repositorybutton and give it a name of your choice.
Download the sample application code to your local machine. You can download the sample code by clicking this link.
Unzip the file and upload all files into your created repository in whichever method you prefer. (You can upload by using the console or by git cloning the repo in your local machine) I cloned the repository, added files locally and then pushed them back into the remote repository. You can follow along with:
git clone <GET REPO URL FROM YOUR AWS CODECOMMIT CONSOLE>
You should see something like this after a successful clone.

Unzip your downloaded source code file and copy the files into your cloned directory.
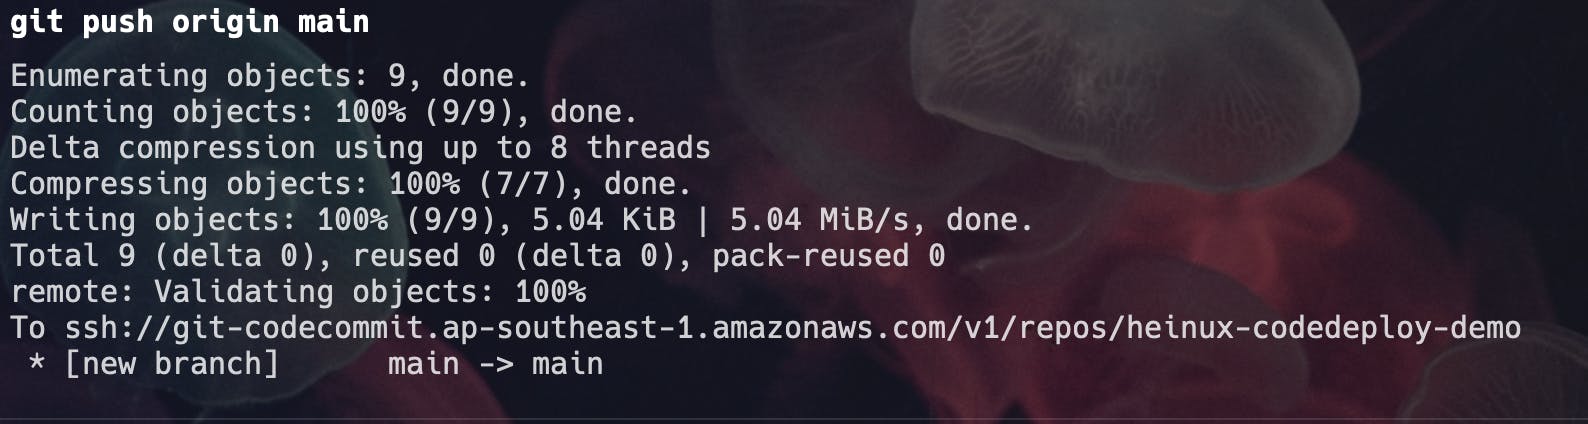
Then, commit them and push them back into the remote repository.
  git add .
  git commit -m "Init Repo"
  git push -u origin main
After a successful push, you should see something similar like this:
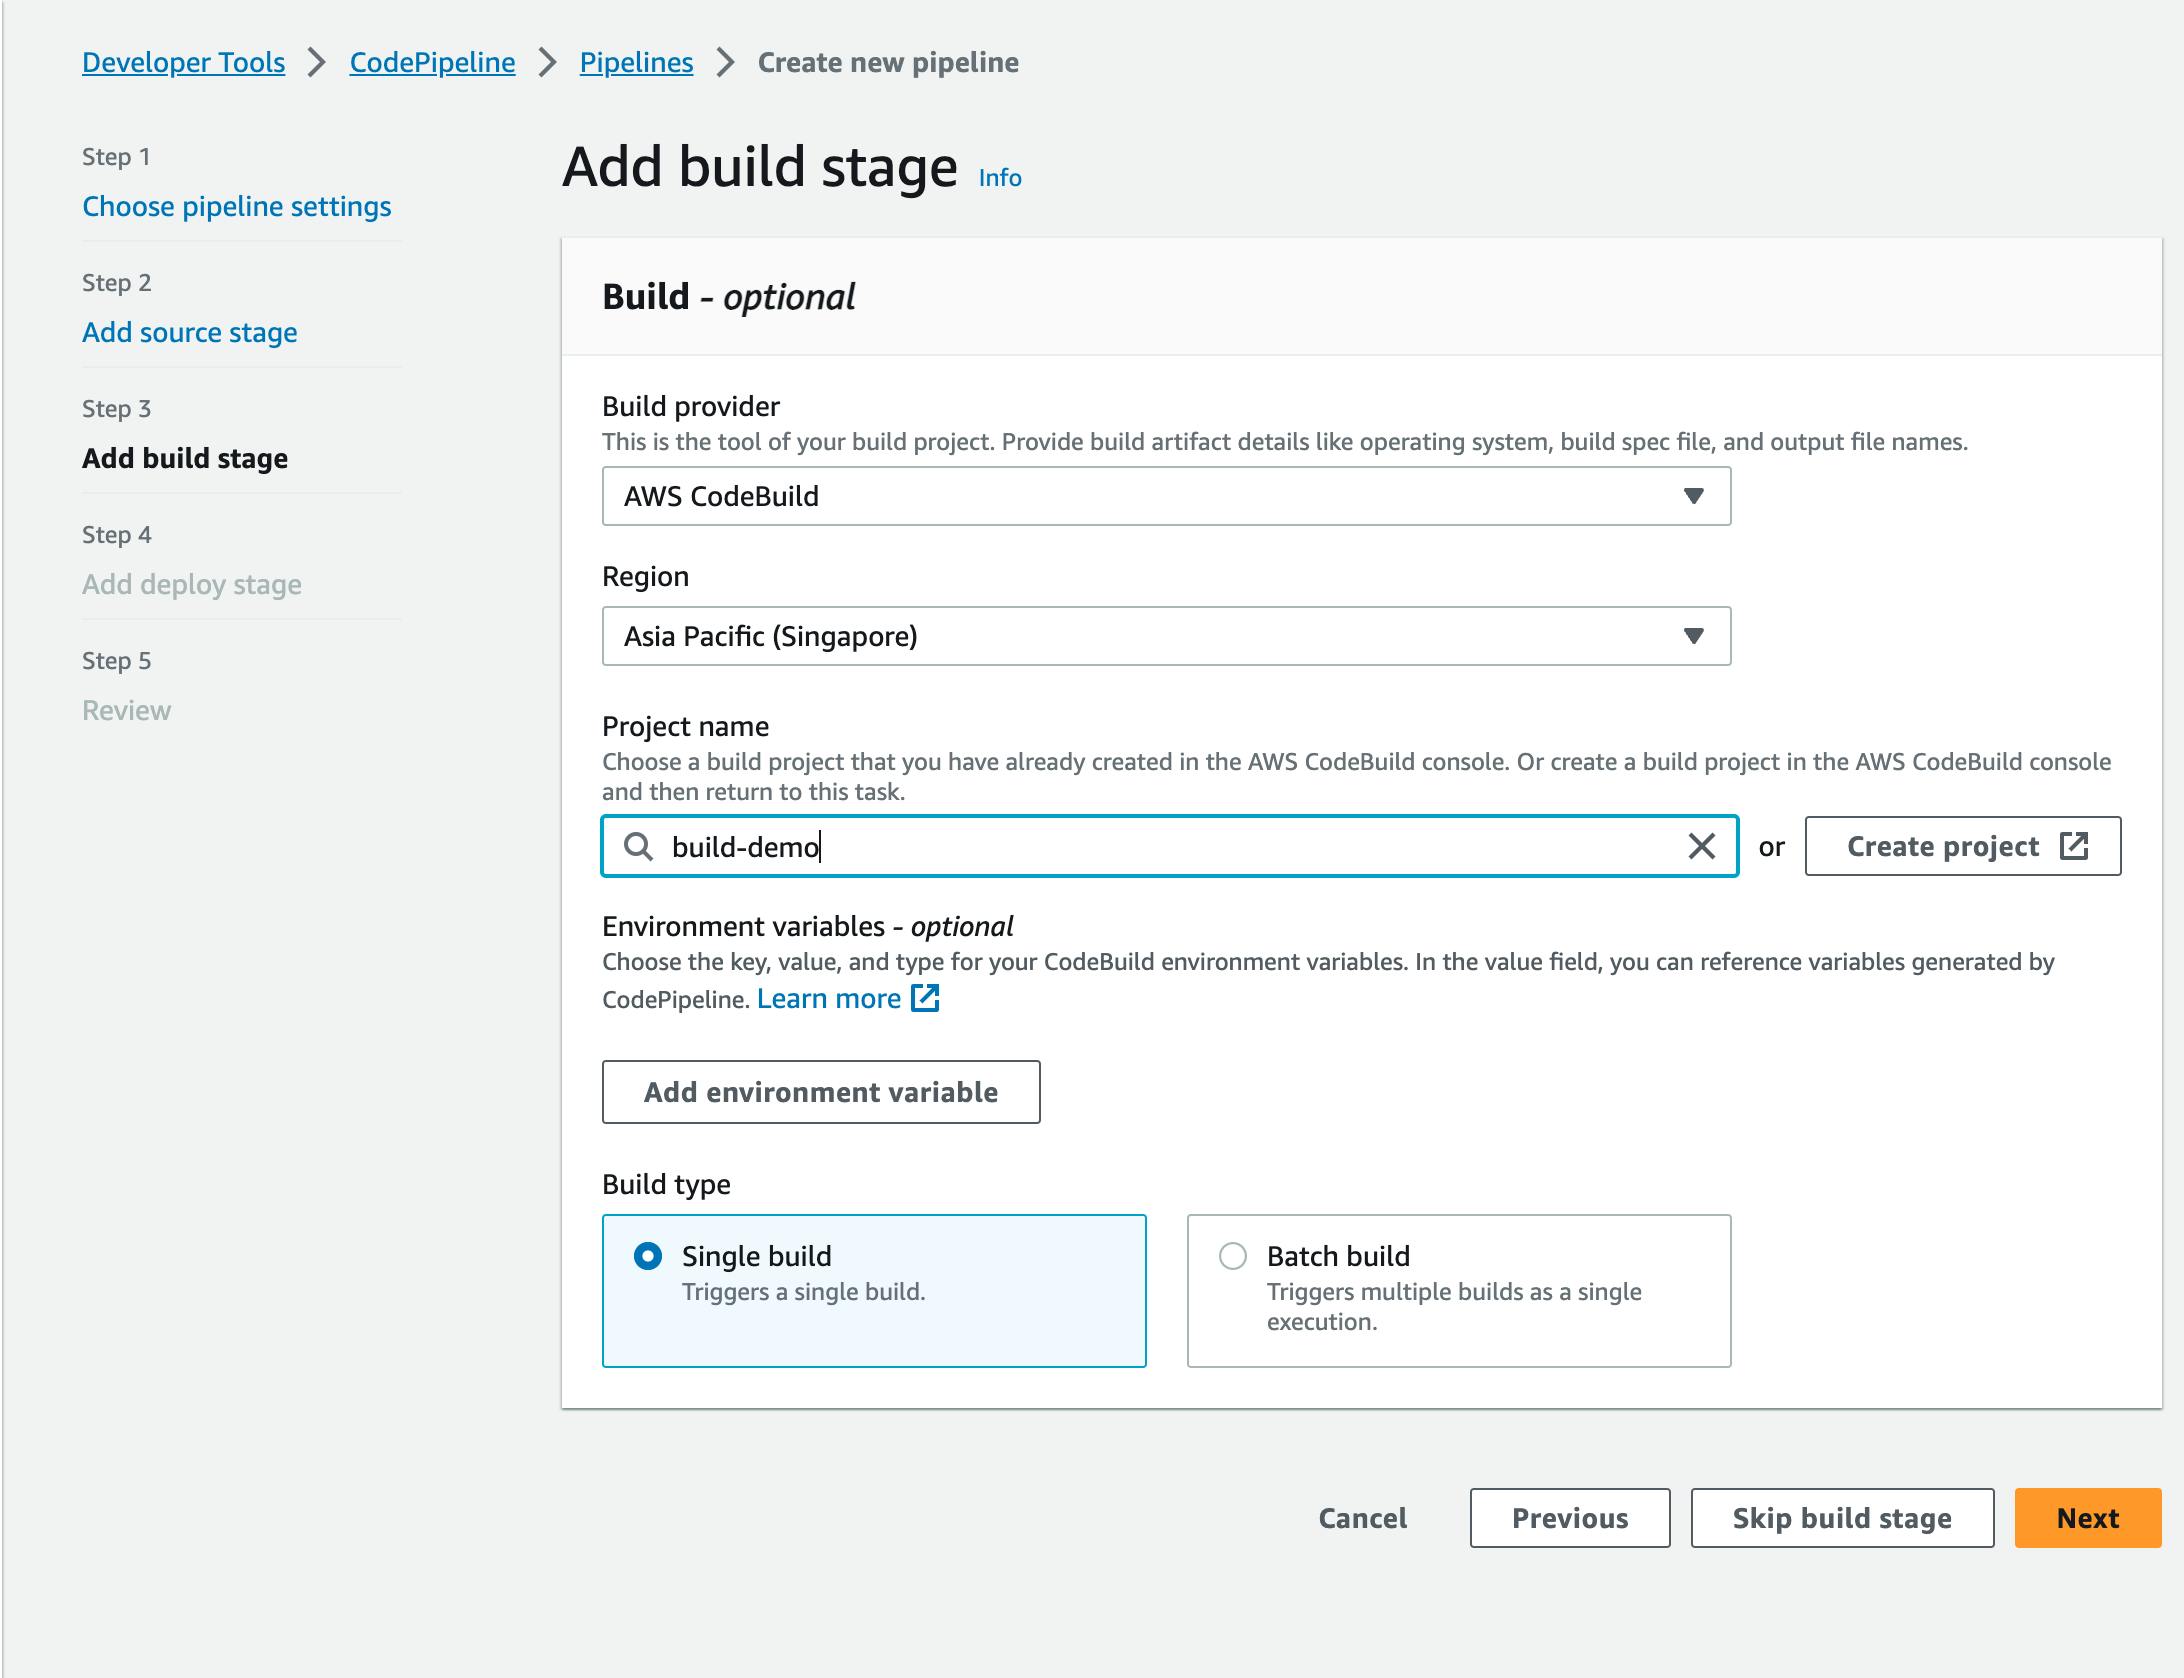
Step 2: Create a CodeBuild Project
After your code is pushed into a source control system like CodeCommit, you can now start configuring a build project for your code.
Go to AWS Console -> Developer Tools -> CodeBuild
Click "Create Build Project"
Give a name of your choice
Choose the Source repository and branch.
Choose the environment to run the build stage.
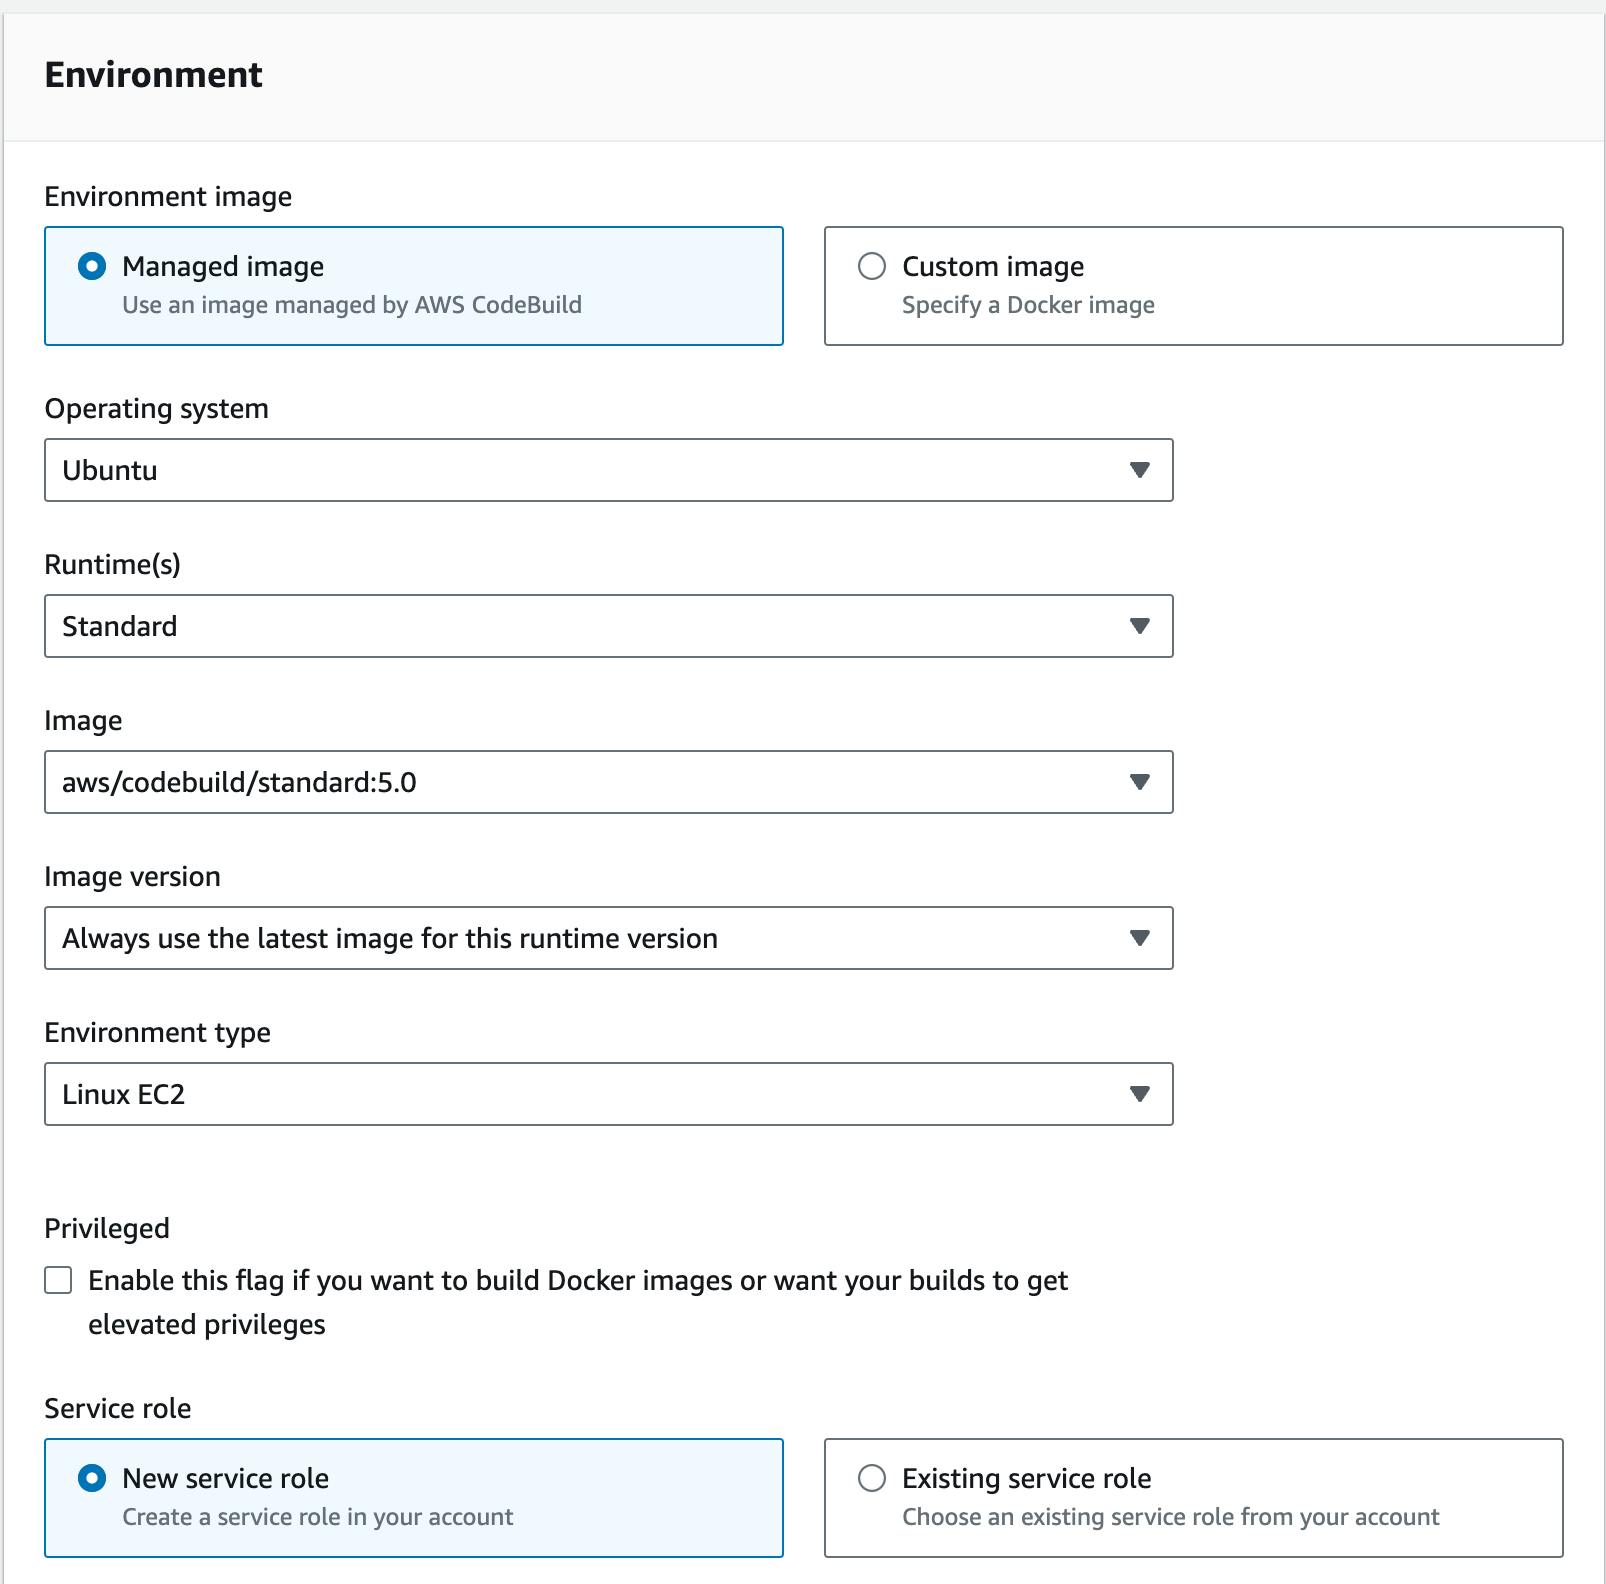
Specify your buildspec file name. (Default: buildspec.yml)
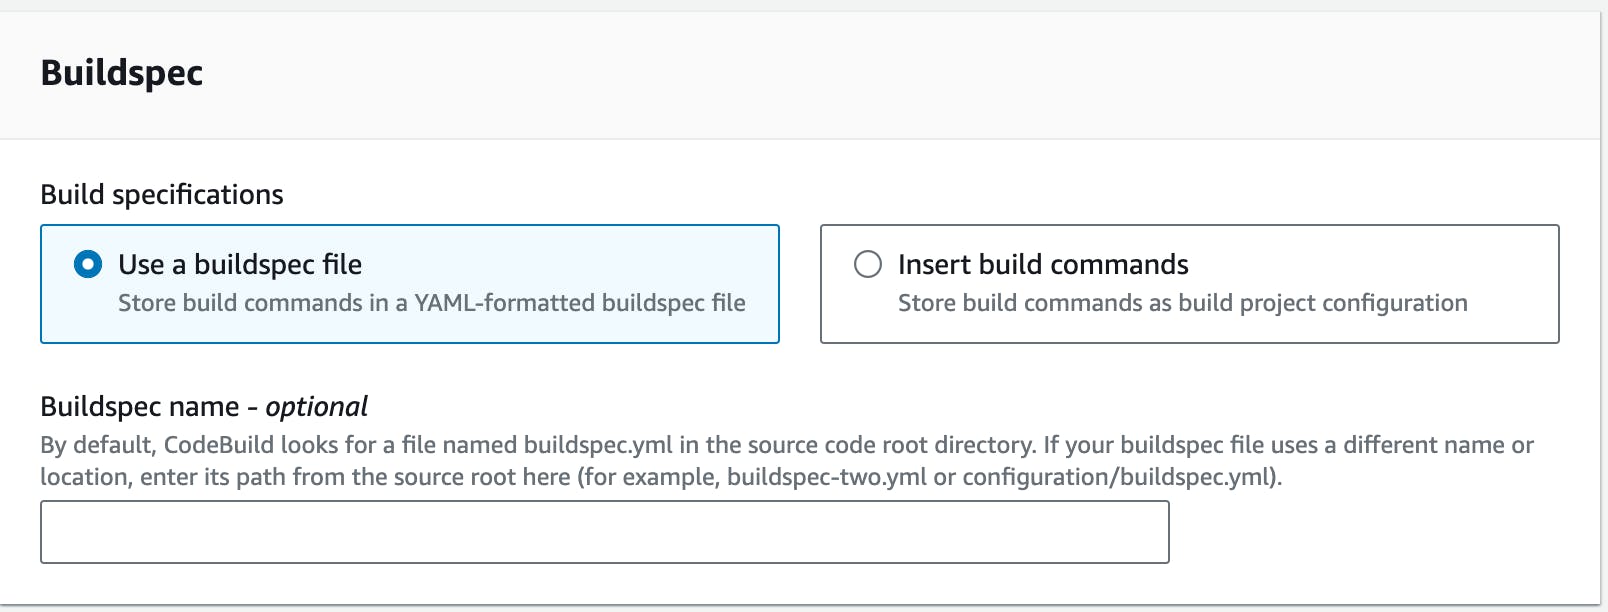
Leave other fields as default and create your build project.
Step 3: Create an EC2 instance to host your application
To begin with, set up an EC2 instance role that contains the two following permissions managed by AWS:
AmazonEC2RoleforAWSCodeDeployAmazonSSMManagedInstanceCore
if you have already created a role for EC2 in the above example, you can also re-use that role for your EC2 instance.
Create an EC2 Instance with the following configurations:
Enter your preferred name in the Name box. (You will need this name later to select matching instances from CodeDeploy)
Choose the Ubuntu Image. (This is important because our scripts contain commands that will only work in Ubuntu.)
Instance type to t2.micro.
Select
Proceed without a keypairIn the Security Group section, Choose
Create Security Groupand allow port 3000 from anywhere i.e.0.0.0.0/0Under Advanced details, in the IAM instance profile section, choose the IAM role you created above.
That's all. Choose 1 for the number of instances and click
Launch instance.
Step 4: Create a CodeDeploy Application and Deployment Group
The next step is to create a CodeDeploy Application and Deployment Group. So, head over to AWS Console -> CodeDeploy -> Create an application.
Firstly, create an IAM role with a name like
CodeDeployRolethat contains the following permissions:AWSCodeDeployRole
if you have already create a role for CodeDeploy in the above example, you can reuse that role.
An Application with a name of your choice. Choose
EC2/On-premisesin Compute Platform choice.A Deployment Group with a suitable name that includes the following:
Service role - Choose the role you created in the above step.
Deployment type - Choose
In-placeEnvironment configuration - Choose
Amazon EC2 instancesand provide the Name and Value you put in the EC2 configuration.Deployment settings - Choose
CodeDeployDefault.OneAtATimeLoadbalancer - Untick the box of
Enable load balancing
Step 5: Create a CodePipeline pipeline
Last but not least, if you want to create an automated deployment environment i.e. whenever you push code changes into a source repository, the code will be deployed into an EC2 instance, you need to create a pipeline.
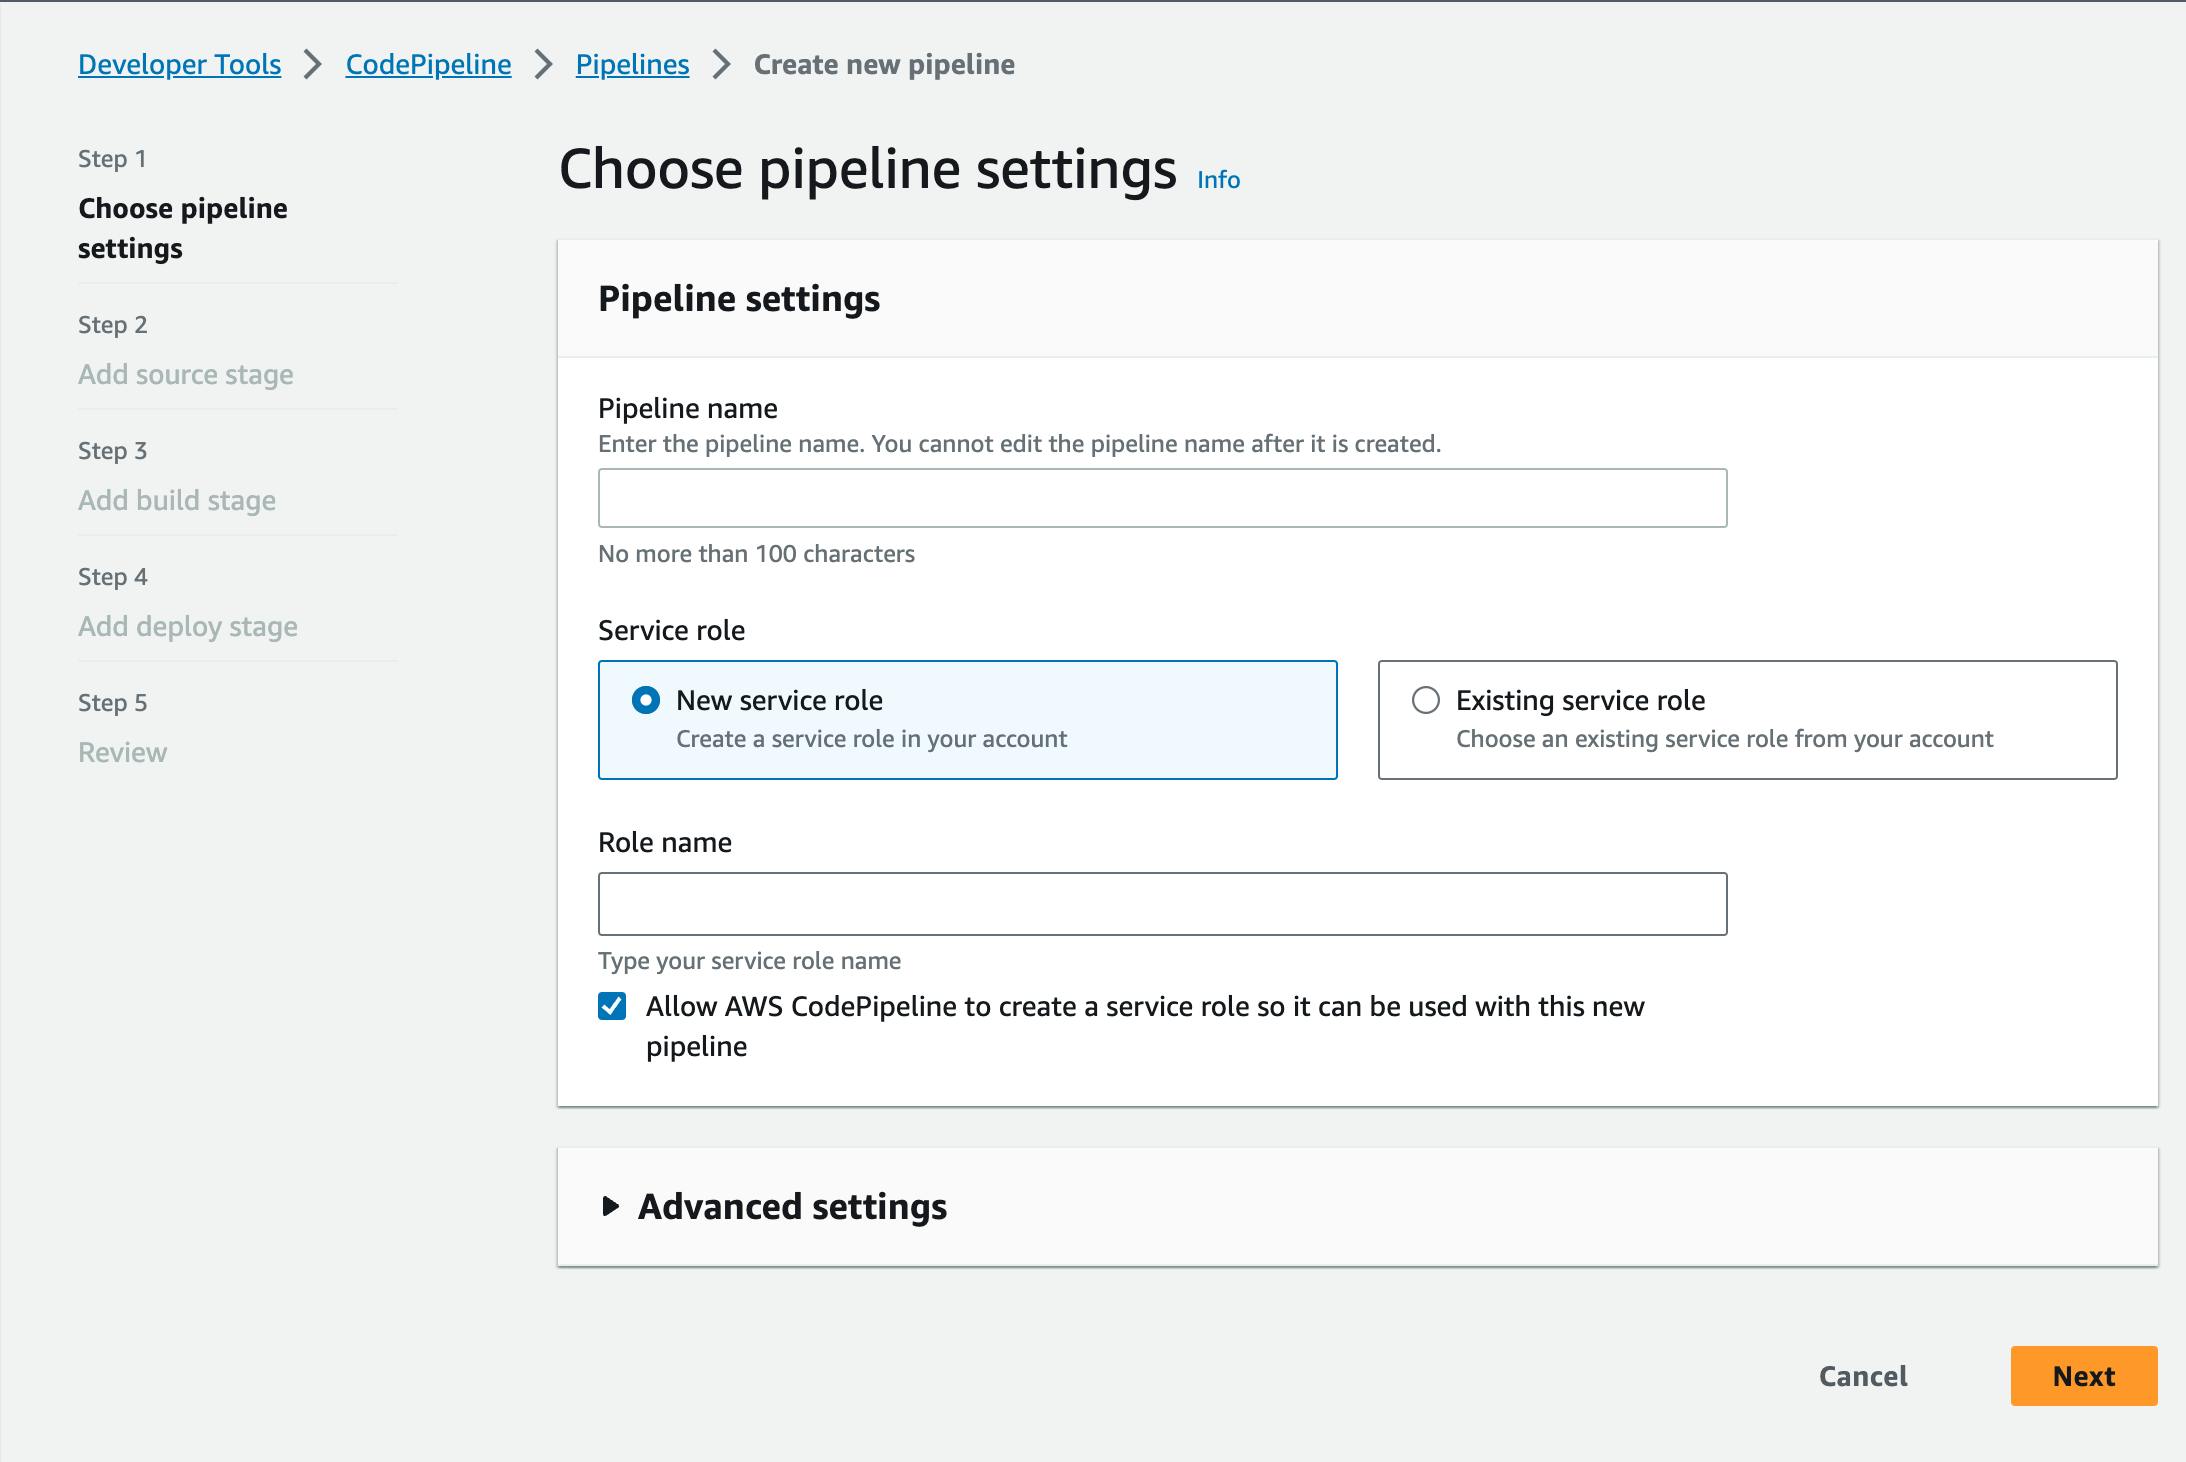
Go to AWS Console -> CodePipeline -> Create Pipeline
Give a pipeline name of your choice, select New service role and give it a name too.
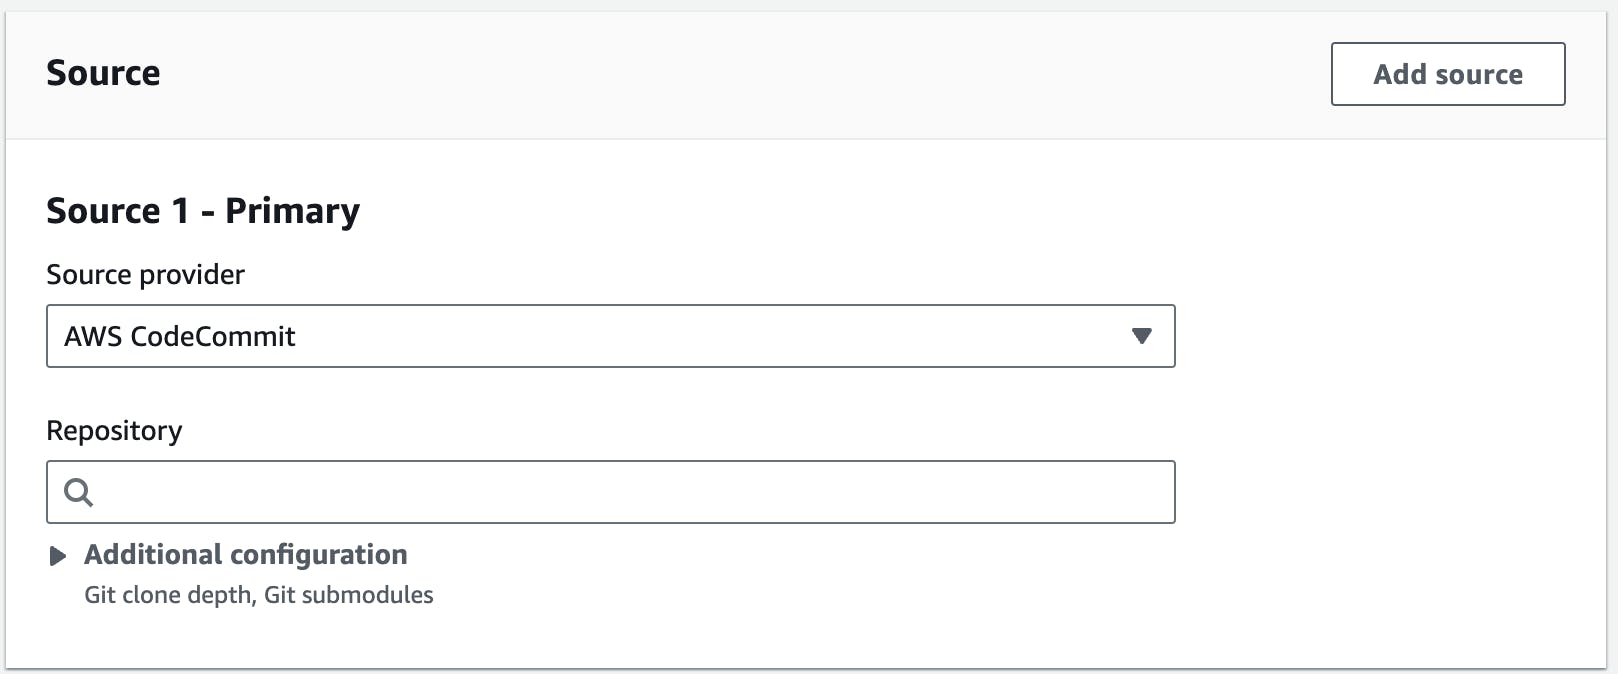
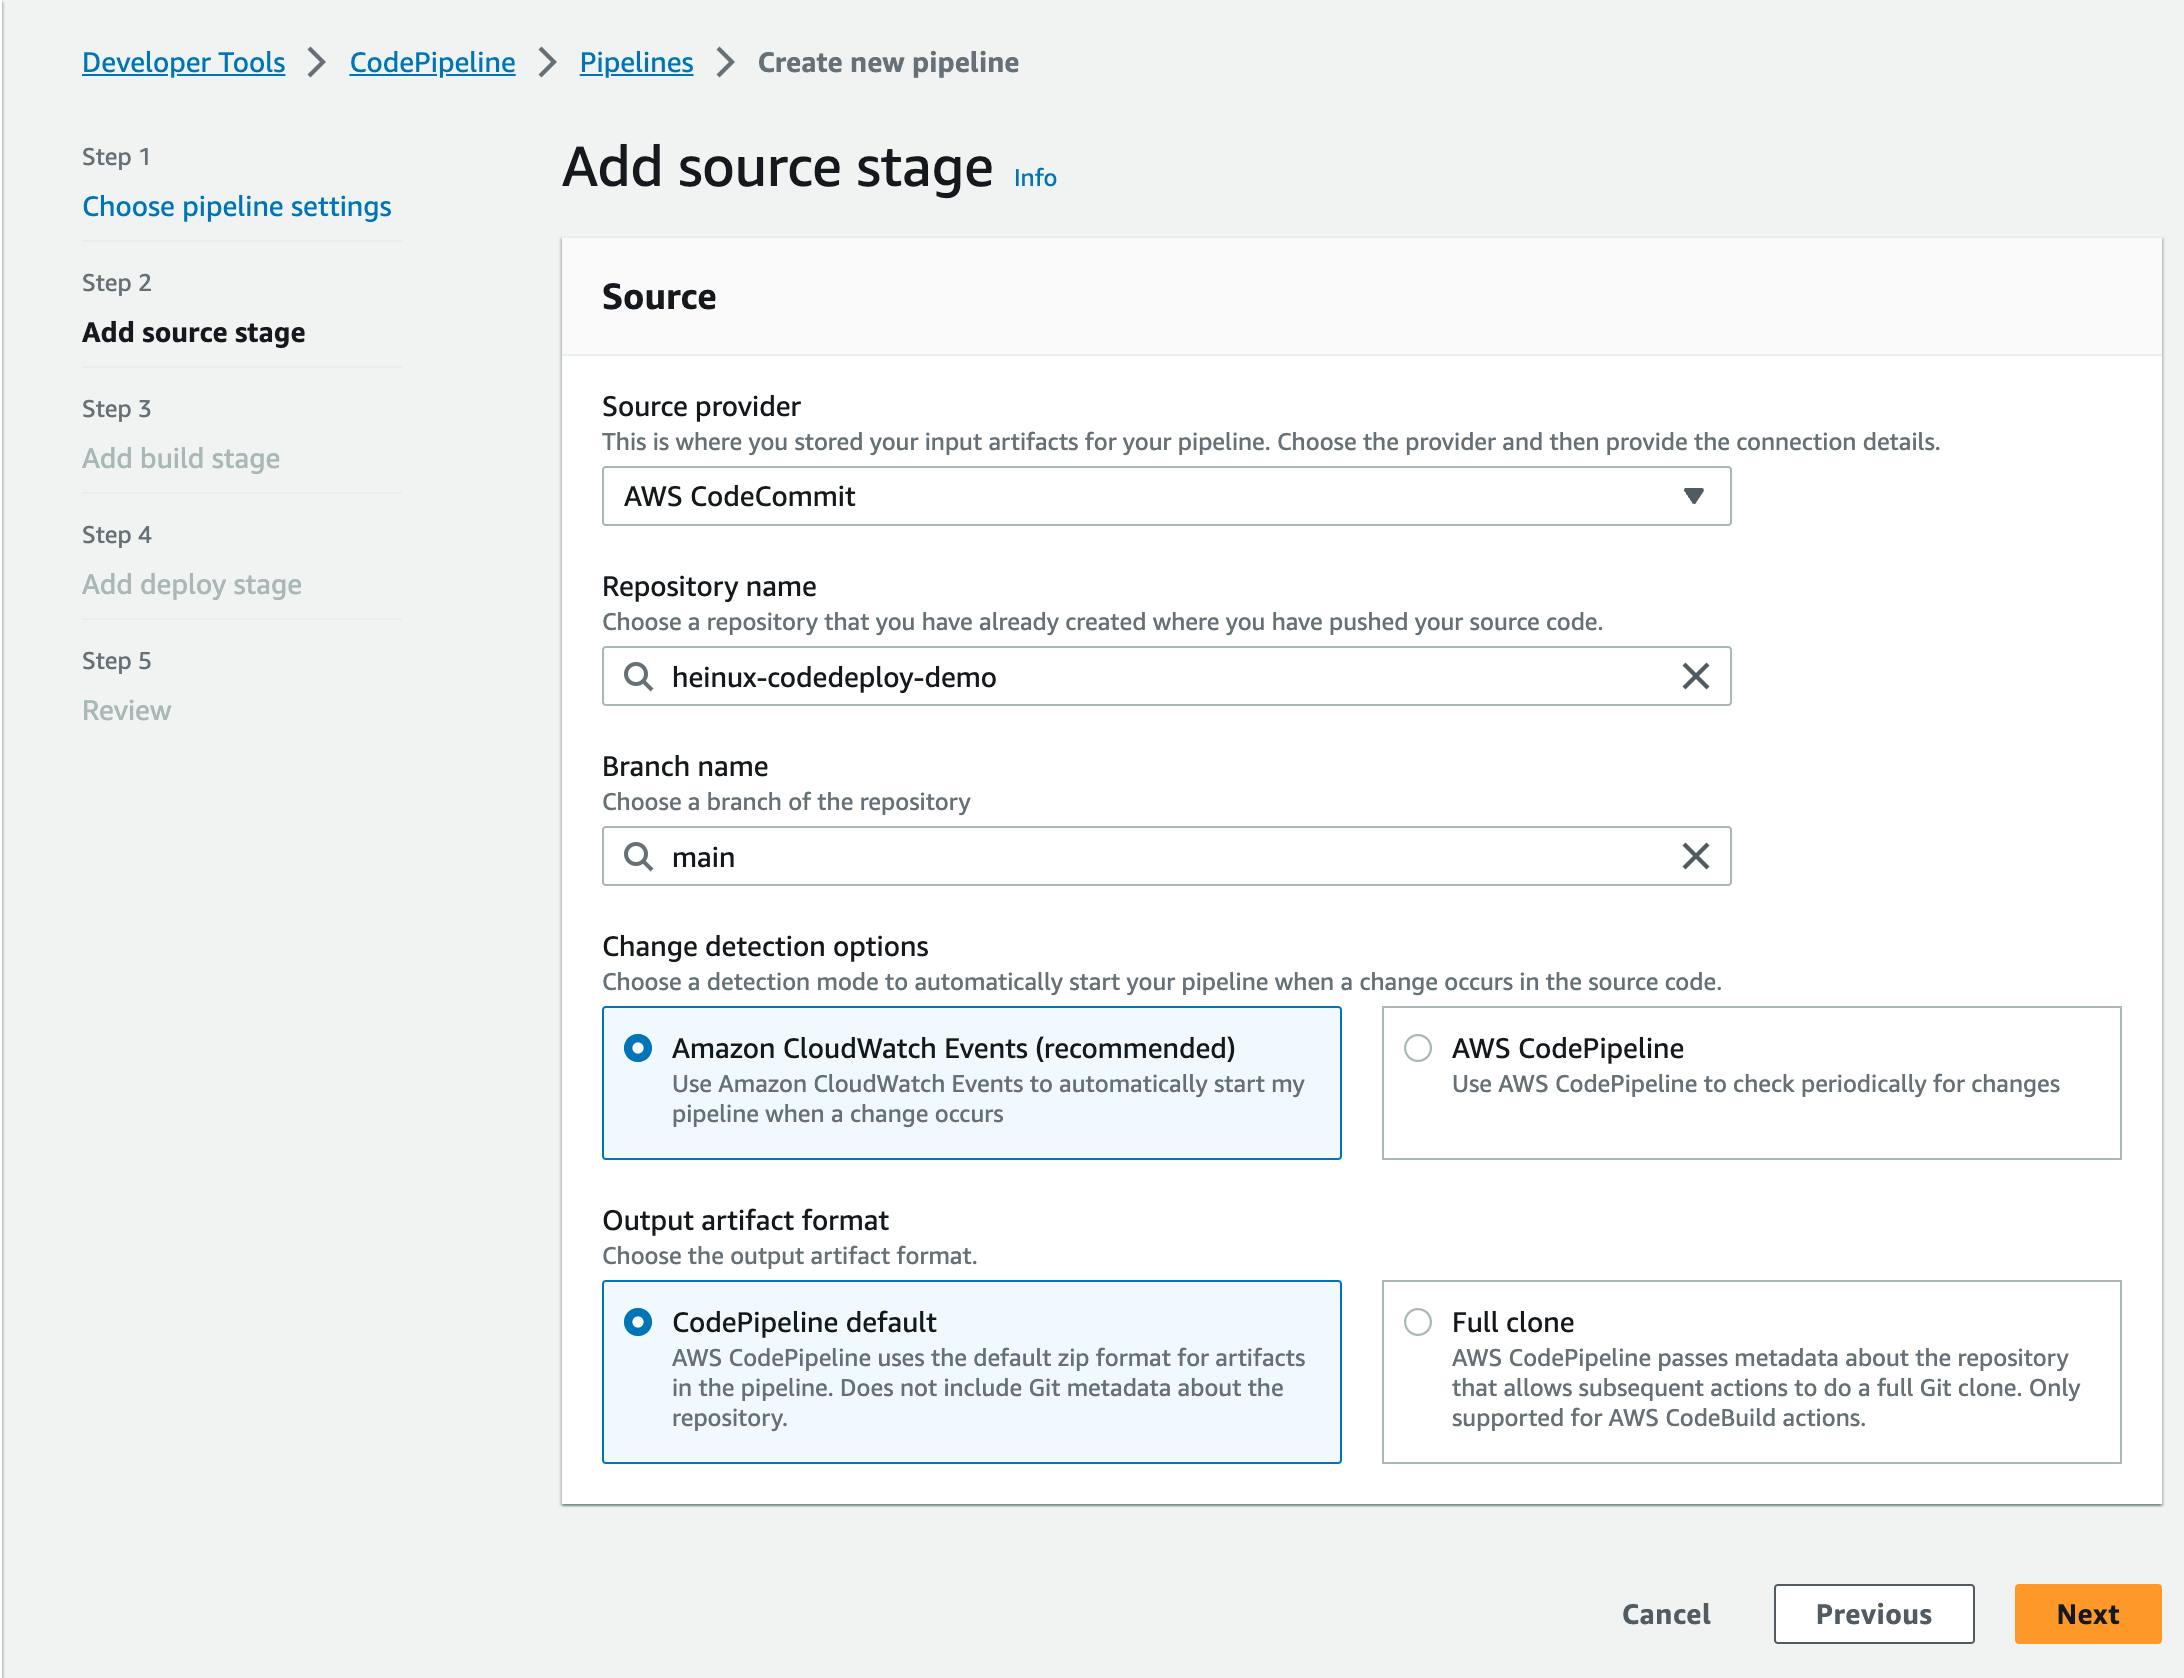
Choose the source CodeCommit repository you created above and the branch name. (default: main)
Choose the CodeBuild Project you created in Step 2.
Choose the CodeDeploy Application name and Deployment group.
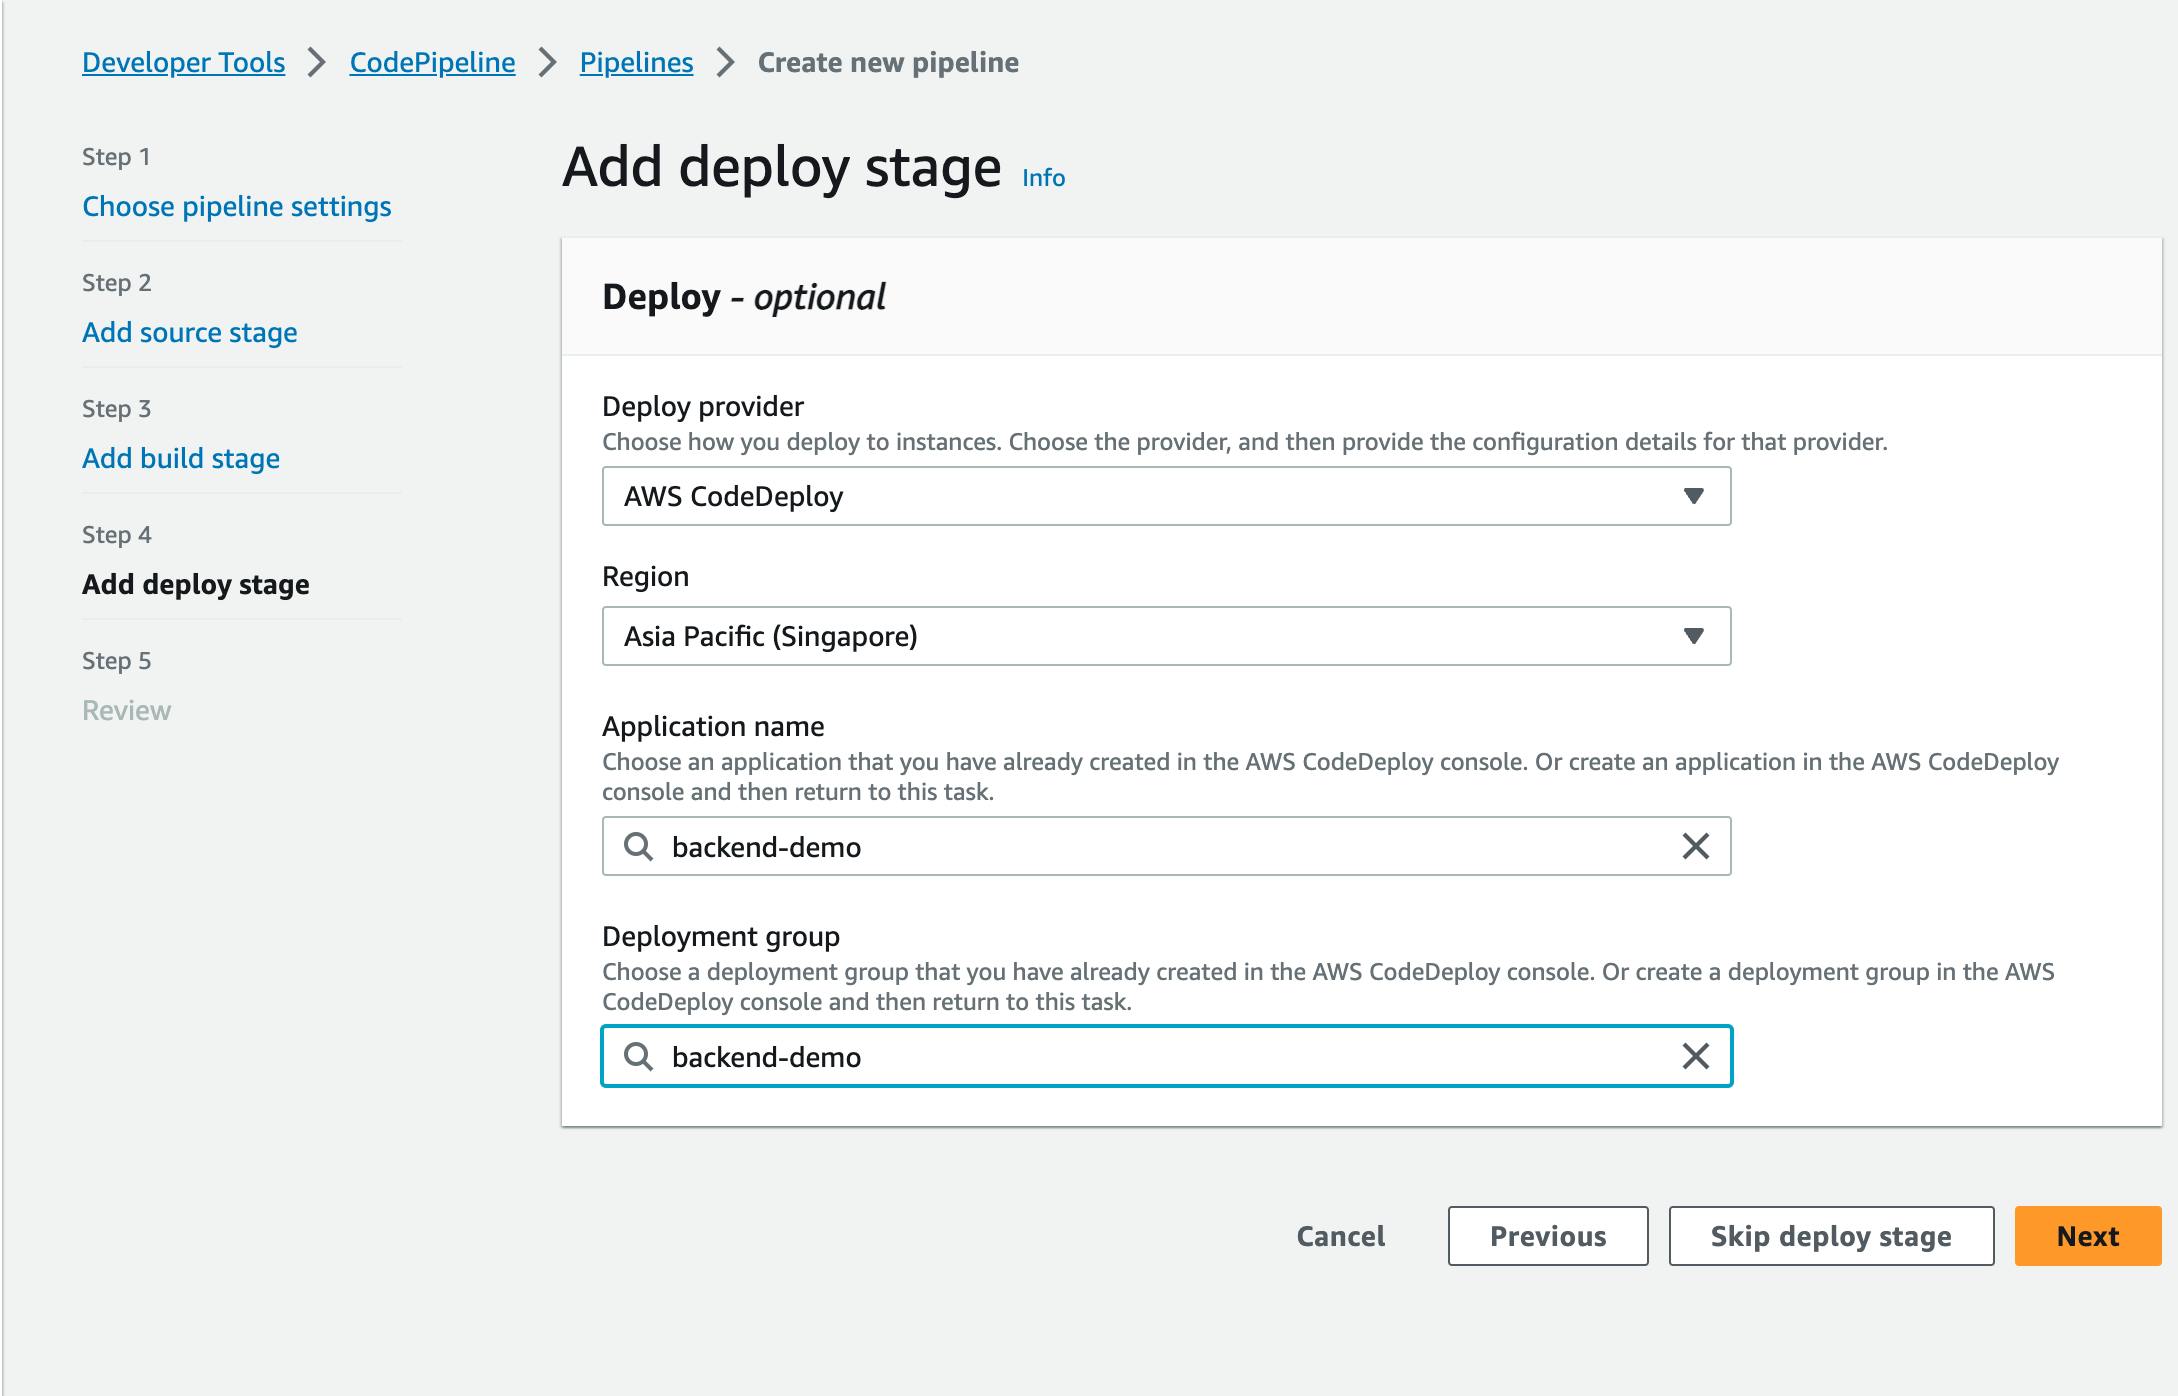
Review and Create the Pipeline.
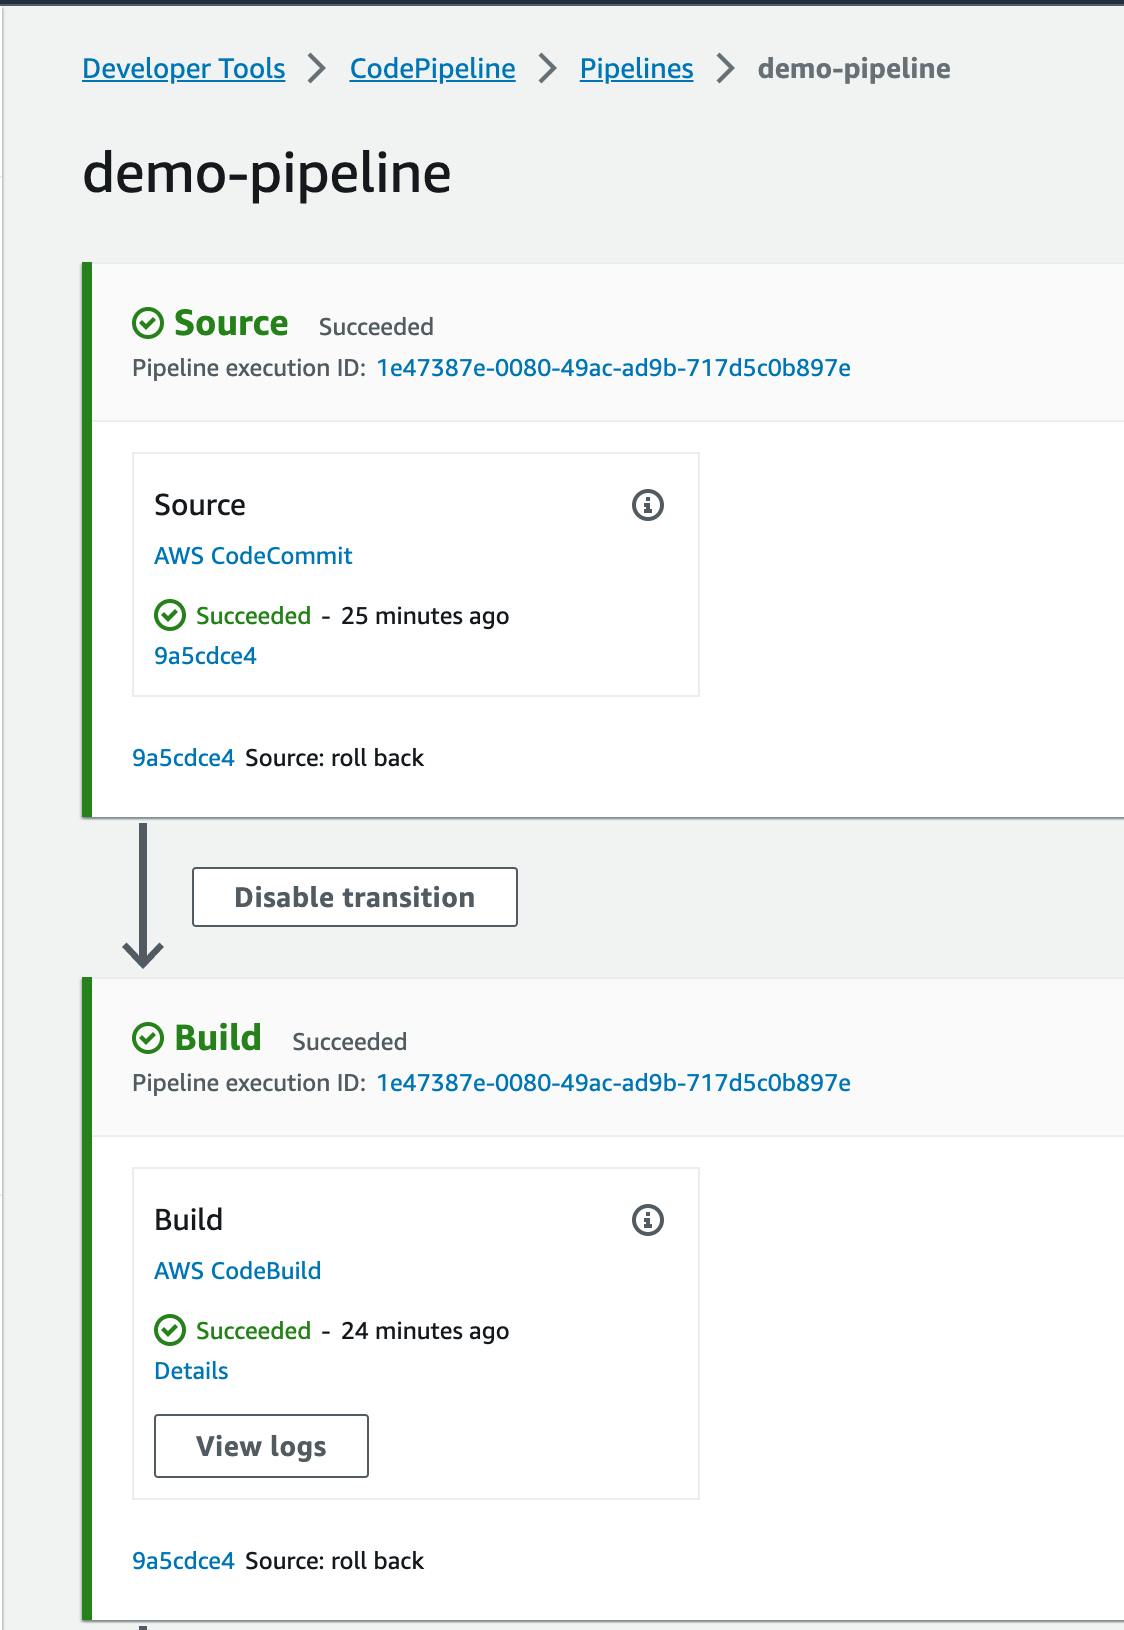
Step 6: Testing if that works or not
After you have created a pipeline, the pipeline will run automatically for the first time with your latest HEAD commit from the selected branch.
If your pipeline successfully runs and succeeds, you will see output similar to this in the CodePipeline console.
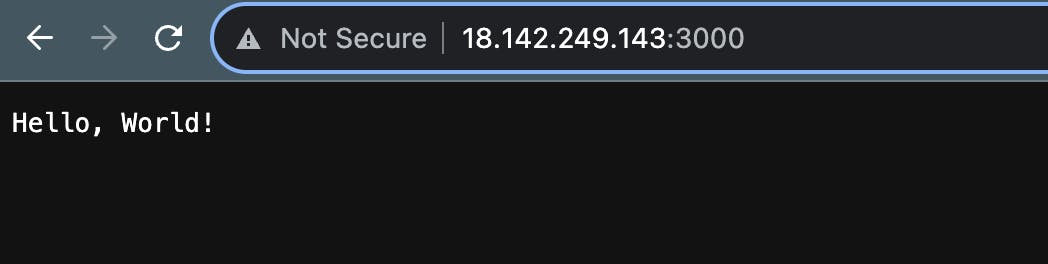
After your pipeline has succeeded, you can now copy your EC2 instance's public IP address and go to port 3000 in your browser i.e. http://<public-ip>:3000 You can now see the "Hello World" text I put in main.js for testing purposes.
Conclusion
In summary, you can only utilize the CodeDeploy service for a single deployment if you want to manually deploy from object storage like S3. However, for greater sustainability, you can use the AWS Codepipeline service to put up an automated environment like CI/CD pipelines.
References
You can download the SampleApp_Linux.zip from here or from the official Documentation page here.
The source code for the second example that includes CodePipeline is hosted here for your reference.